Configure Webhooks
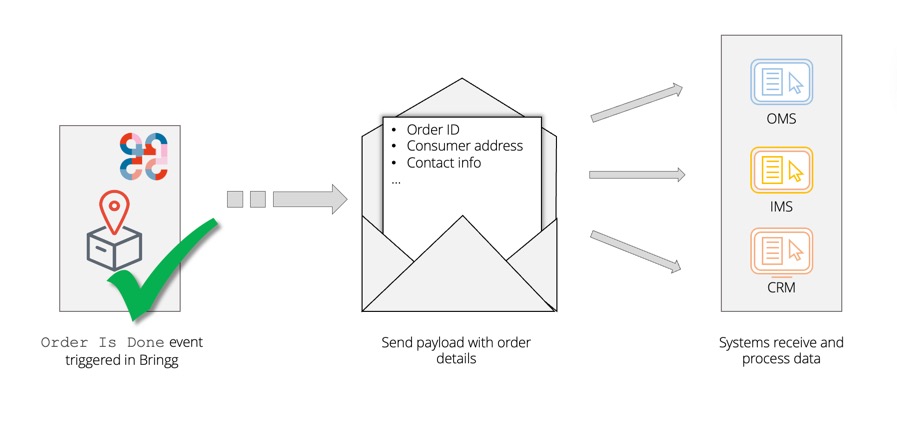
Throughout the delivery process, Bringg Delivery Hub actively and passively receives status updates from your carriers, then forwards these updates to you in a standardized HTTP Post webhook using the same format as the responses Bringg sends to your API requests. This way, your systems can stay updated without sending requests for new data and do not need to be mapped to the data structure of each carrier.
You can configure webhooks to send updates to multiple URLs. For example, you can set up webhooks to automatically update your systems when a shipment's status changes. You could also build a workflow that automatically sends an SMS to customers when the shipment reaches a specific checkpoint.
You can also set up automatic email and SMS notifications directly from Delivery Hub. Learn more.
Before you begin
- Confirm you have the Admin user type.
- Verify the URL endpoint and authentication header of the application that will receive the webhooks.
Configure Webhooks in Delivery Hub
- Go to Settings > Integrations > Webhooks.
- Select Add Webhook and enter the required details.
| Field | Description |
|---|---|
| Webhook name | Enter a webhook name that is distinct and recognizable to your users. |
| Description | (Optional) Enter additional information about the webhook, such as its purpose (e.g., to trigger SMS messages) and the application receiving the webhook payloads. |
| Shipping account | Enter the shipping accounts whose status updates you want to track. The default is all shipping accounts. |
| Select Events | Select which shipment events to track. Learn more about the events you can track. |
| Webhook URL | Enter the URL endpoint where Bringg should send the webhook payloads. |
| Header | (optional) Enter the authentication information to include at the top of your webhooks. This allows the receiving system to confirm that the webhook is authorized. |
- Select save to enable the new webhook.
Updated about 1 year ago